As the name of the article says, this is a 3 min guide to add & remove custom fonts on your Mac.
What you need to succeed:
– A Mac 🙂
– No special skills
– 0 Experience
– Magic mouse
– Keyboard
– And of course, electricity
Hopefully, you have all of the above and we can start this guide.
This wants and hopefully is the fastest guide on the web for adding and removing fonts from your Mac.
First, find out and see what fonts are installed on your MacThe easiest way to find and view all the fonts that you have on your Mac is to open the Font Book app.
Start Finder and search for Font Book.
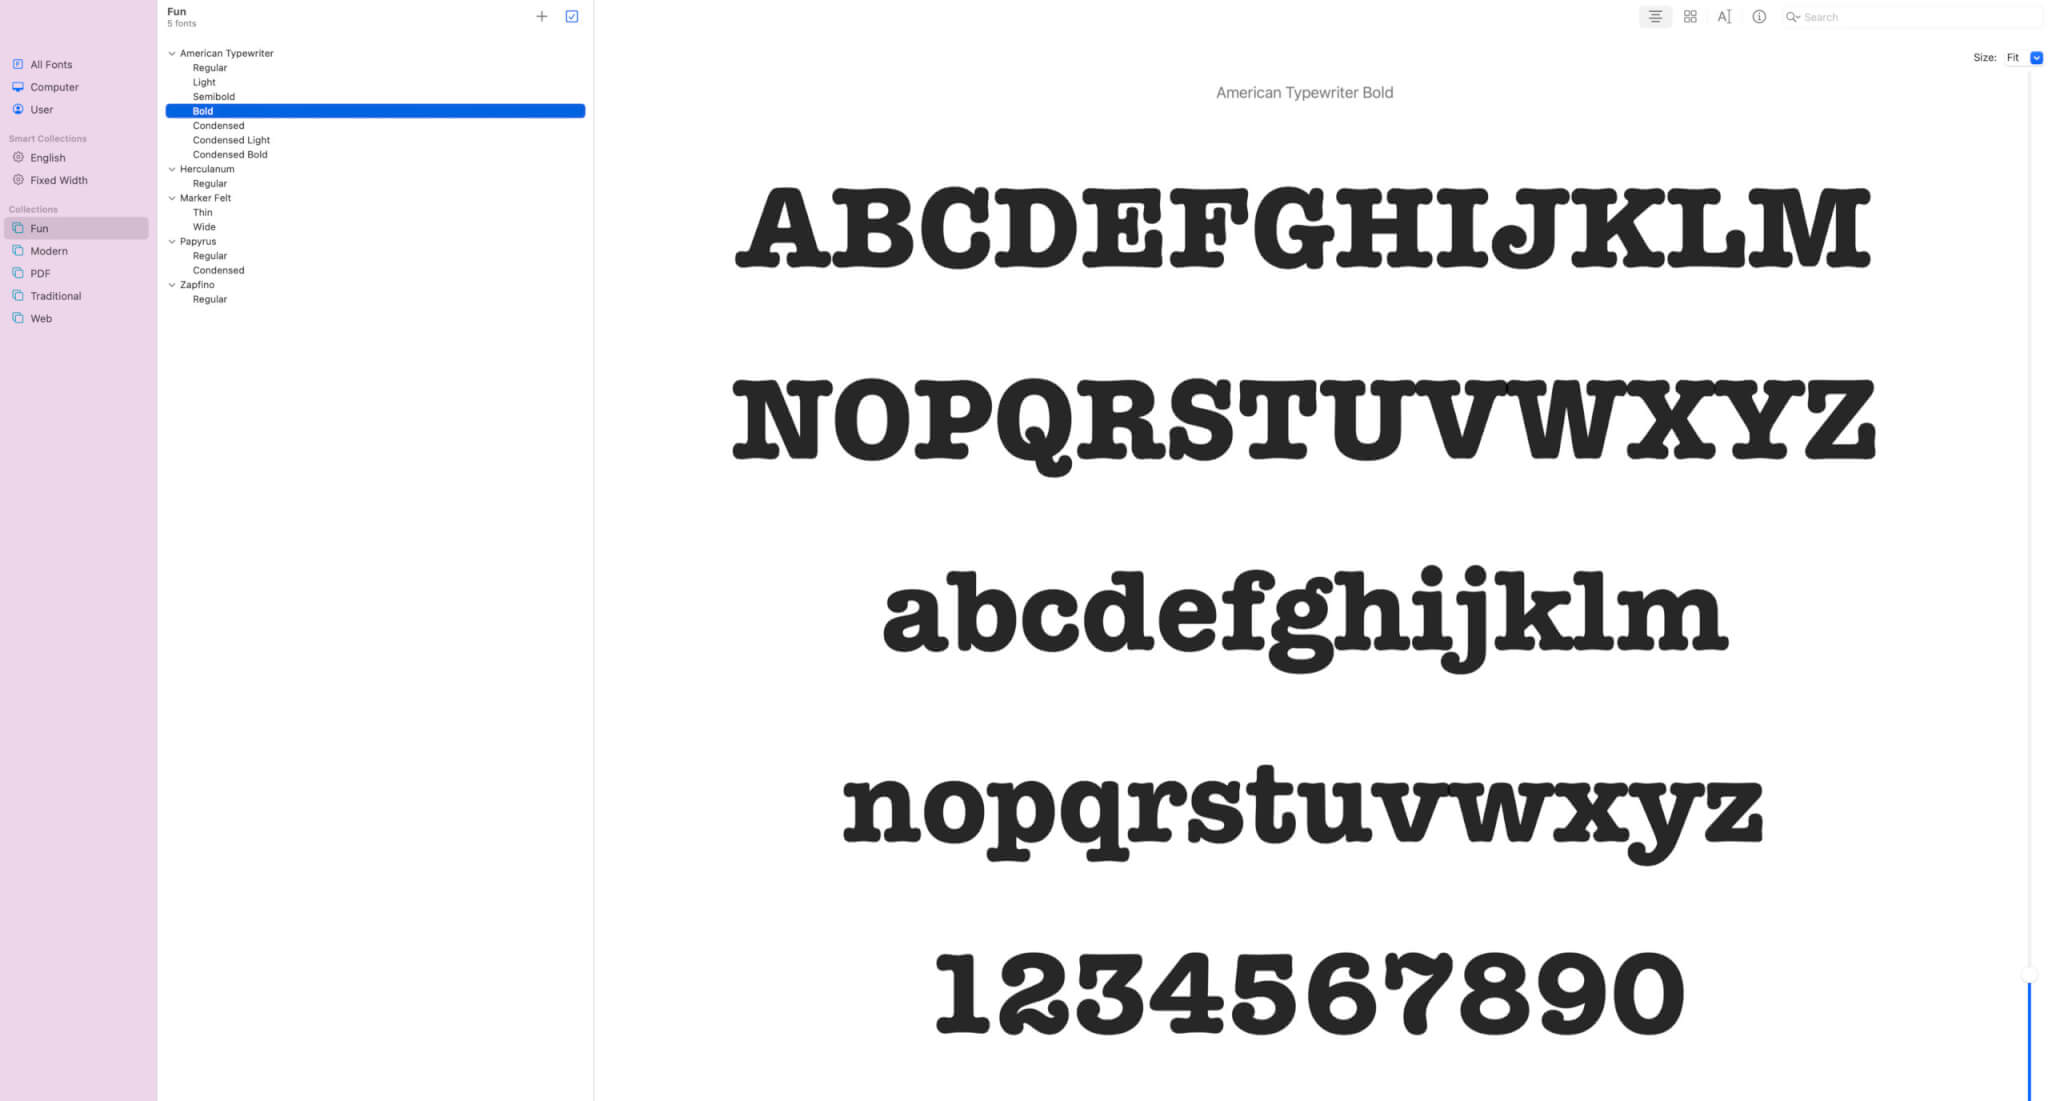
This is what the app looks like.

The app has 3 panels.
On the left you will see the collections you want to look at.
If you want to quickly see all the fonts that are installed on your Mac, select All Fonts or English.
In the center panel, you will see all the fonts from the collection you selected.
The right part of the app shows you the preview of the currently selected font.
Have in mind that you can scroll through the preview and view all the weights, styles, etc. of the font you selected.
How to add fonts on your MacThere are 2 ways to add fonts to your Mac.
1. The fastest and simplest way is to use Font Book.As you for sure noticed, many of the fonts are grey.
If you want to install them, select the ones you like and click the button Download.
The button is located in the upper right part of your screen.
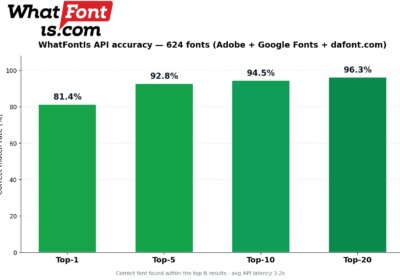
2. The second way is to add fonts from the web.You can use WhatFontIs to identify fonts that you like, download them, and then install them on your Mac computer.
The cool thing about WhatFontIs is that the web tool is 100% free to use, no registration needed, and it lets you identify unlimited fonts, free and paid.
Whenever you identify a font that you like but which is more expensive than you are willing to pay, use the software feature to get 60+ free and paid font alternatives.
Many times, you will find highly similar fonts that are absolutely free to use, even for your commercial projects.
Have in mind that only these font formats work with Mac:
TrueType, .ttf
Variable TrueType, .ttf
TrueType Collection, .ttc
OpenType, .otf
OpenType Collection, .ttc
These are also the most common font formats, if you try to install different formats on your Mac, you might get errors.
After you download the fonts you like, double-click on them and you will get them installed in just a few seconds.
It is very simple and quick.
Now let’s see how to remove fonts from MacTo remove fonts from your Mac, you will use again the Font Book app.
Start Finder, and write Font Book in the search bar.
Hit enter.
Now open the Font Book app.
Right-click on the font you like to remove (you can also just disable it if you don’t want to show in apps), and select Remove or Disable.
Have in mind that you cannot remove “basic” or default fonts that Mac comes with.
Where to look
ConclusionsHopefully, this 3 min guide to add & remove customs fonts on your Mac will open your appetite for brilliant custom new fonts.
As you just saw, it is very simple to add and remove fonts from Mac, even for people with absolutely no experience and computer skills.

I'm a programmer at heart. But in my 20s, I realized there was more to the world of fonts than just Courier.
Driven by endless curiosity, I built a system to explore them.
That project grew into one of the world’s leading font identifier platforms: www.WhatFontIs.com.
By 2024, WhatFontIs is helping nearly one million designers—famous or not—discover the names of the fonts they need.